Tools
C-10 Proportioning Valve bleeder tool mod
After buying CPP brand bleeder tool that looked identical to others, fit loosely in the prop valve. Didn't even use it, returned it and selected the Summit Racing version. Threads fit much much nicer! However, when bleeding the brakes, I must have applied too much pressure on the pedal too fast and the prop valve internals sheered off the plastic nipple.
Result: remove the prop valve and retrieve the
plastic remnants :( no good.. which I had to do...
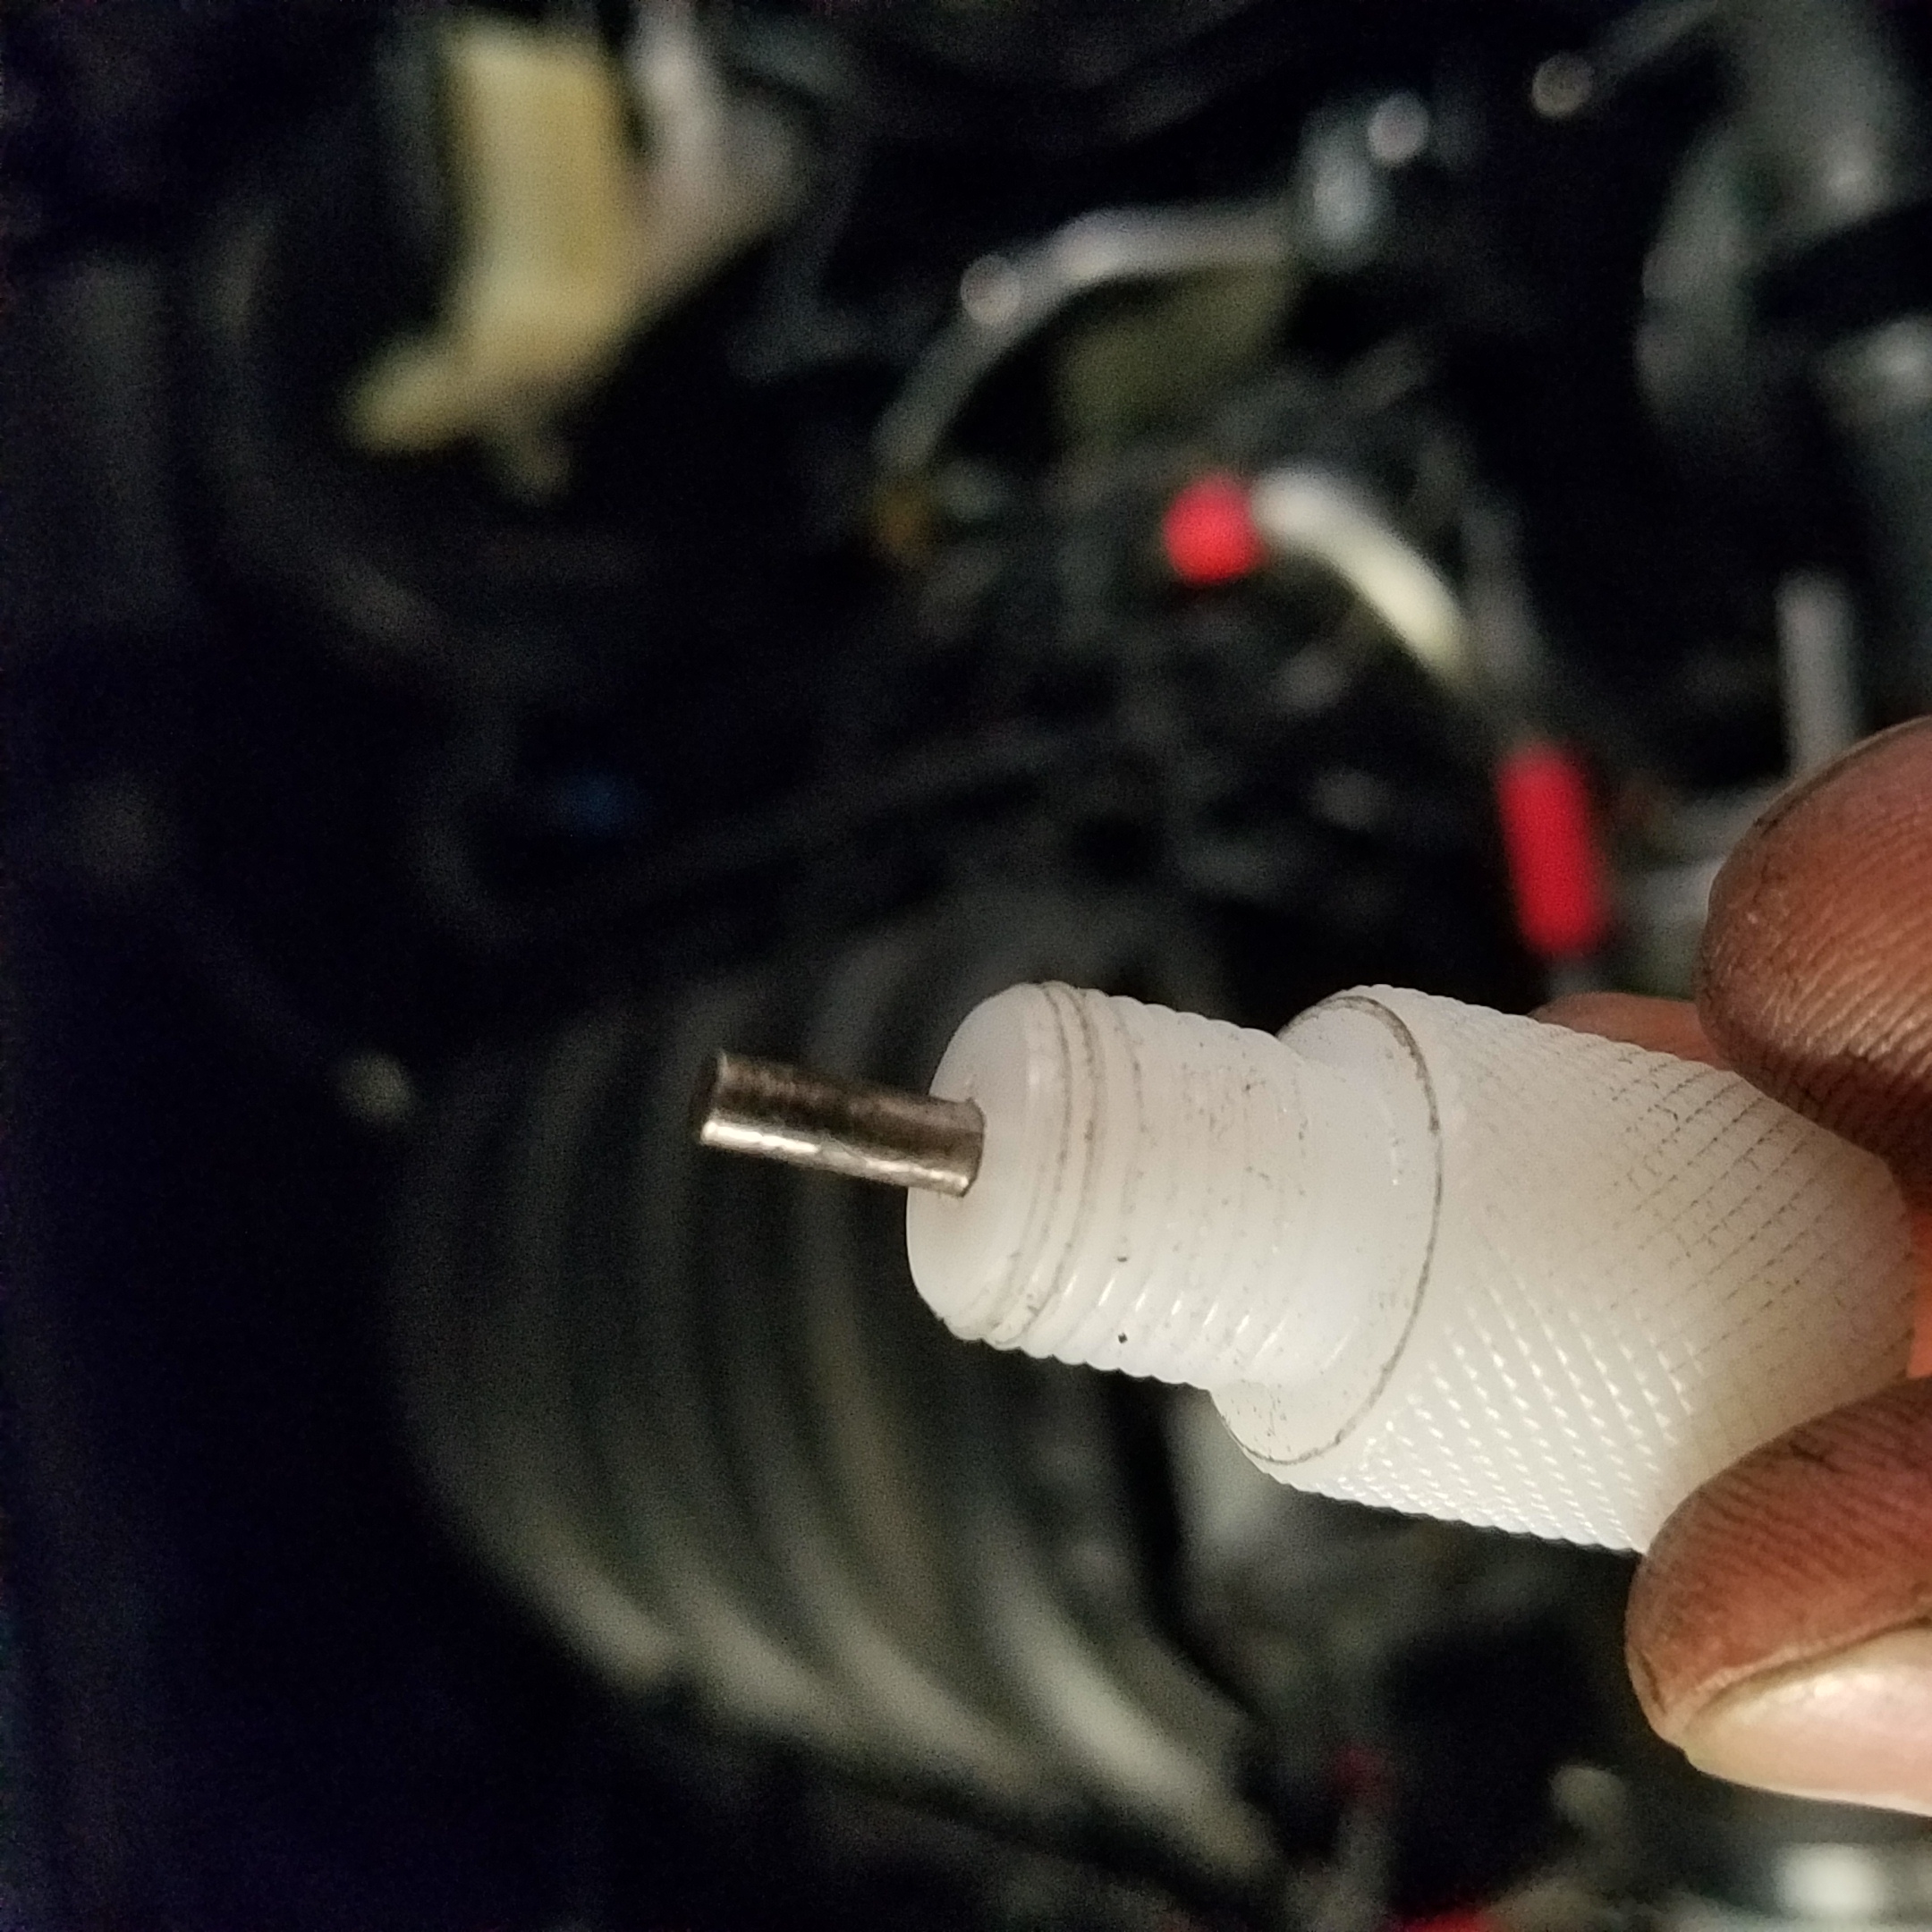
Solution: find the center of the tool, and drill very carefully with the
appropriate size (to be updated) and then take a scrap, /dull, / cheap drill
bit, cut it to size, chuck it into a drill and deburr the edges and super glue
it into the plastic housing. This will not be shearing off!! At the time of
buying this tool, this type of tool was not available.
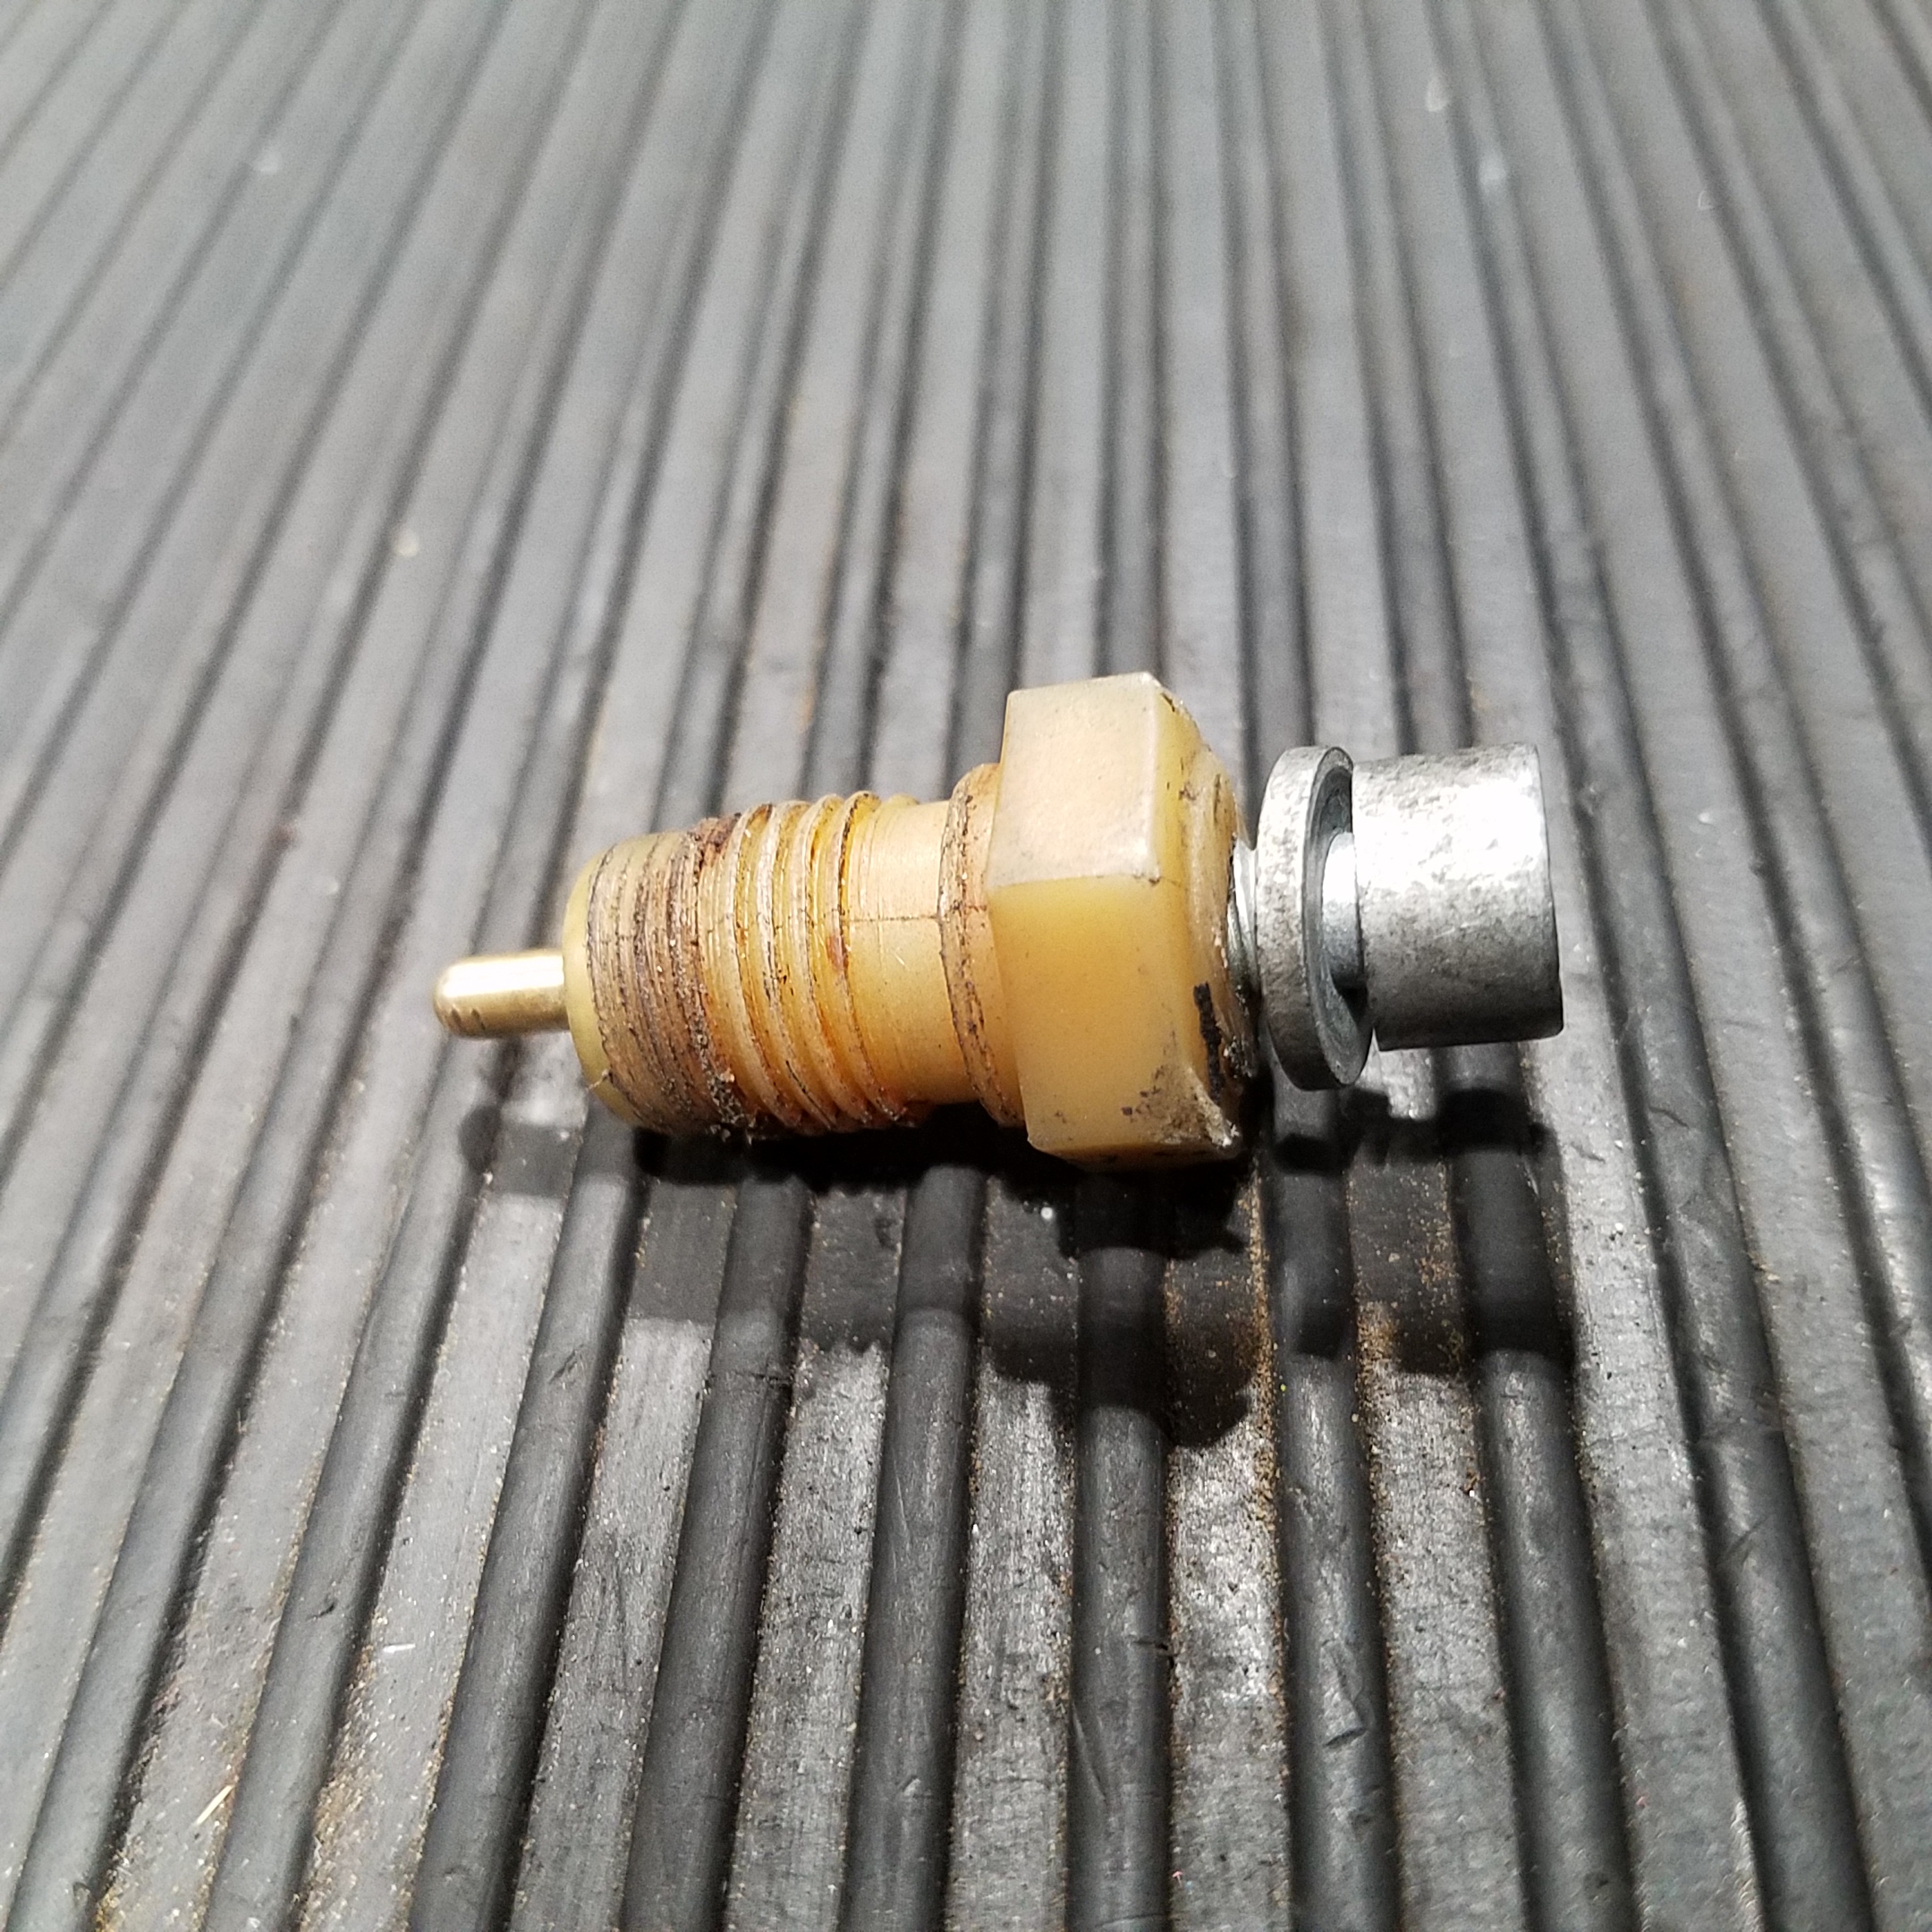
Alternatively, If you have an extra/spare brake warning light
switch you can make your own tool!
If I remember correctly, I believe I just sat the switch upside down
over a socket of the right size, so I could tap the pin, spring and terminal
contact and knock
everything out. Careful, there is a spring between the 2 pieces. Once removed, I
just cut off the connector housing part to make a nice flat surface. Next step
is to tap
it to fit a bolt. I chose m6x1.0 thread due to my profession and access to a ton
of used
metric fasteners. Size here, does not matter, its just so happened that this did
not require drilling, I think i just ran the tap through it. Best bet, check the
Tap/Drill chart online to make sure you don't split the housing!
Assembly:
Install the pin that you see in the picture on the far left that enters the
combo valve, leave spring out, install chosen
bolt (my case m6x1.0), thread the tool into combo valve. Once its threaded and seated like O.E.,
turn bolt until its snug, then, you have yourself a bleeder tool!
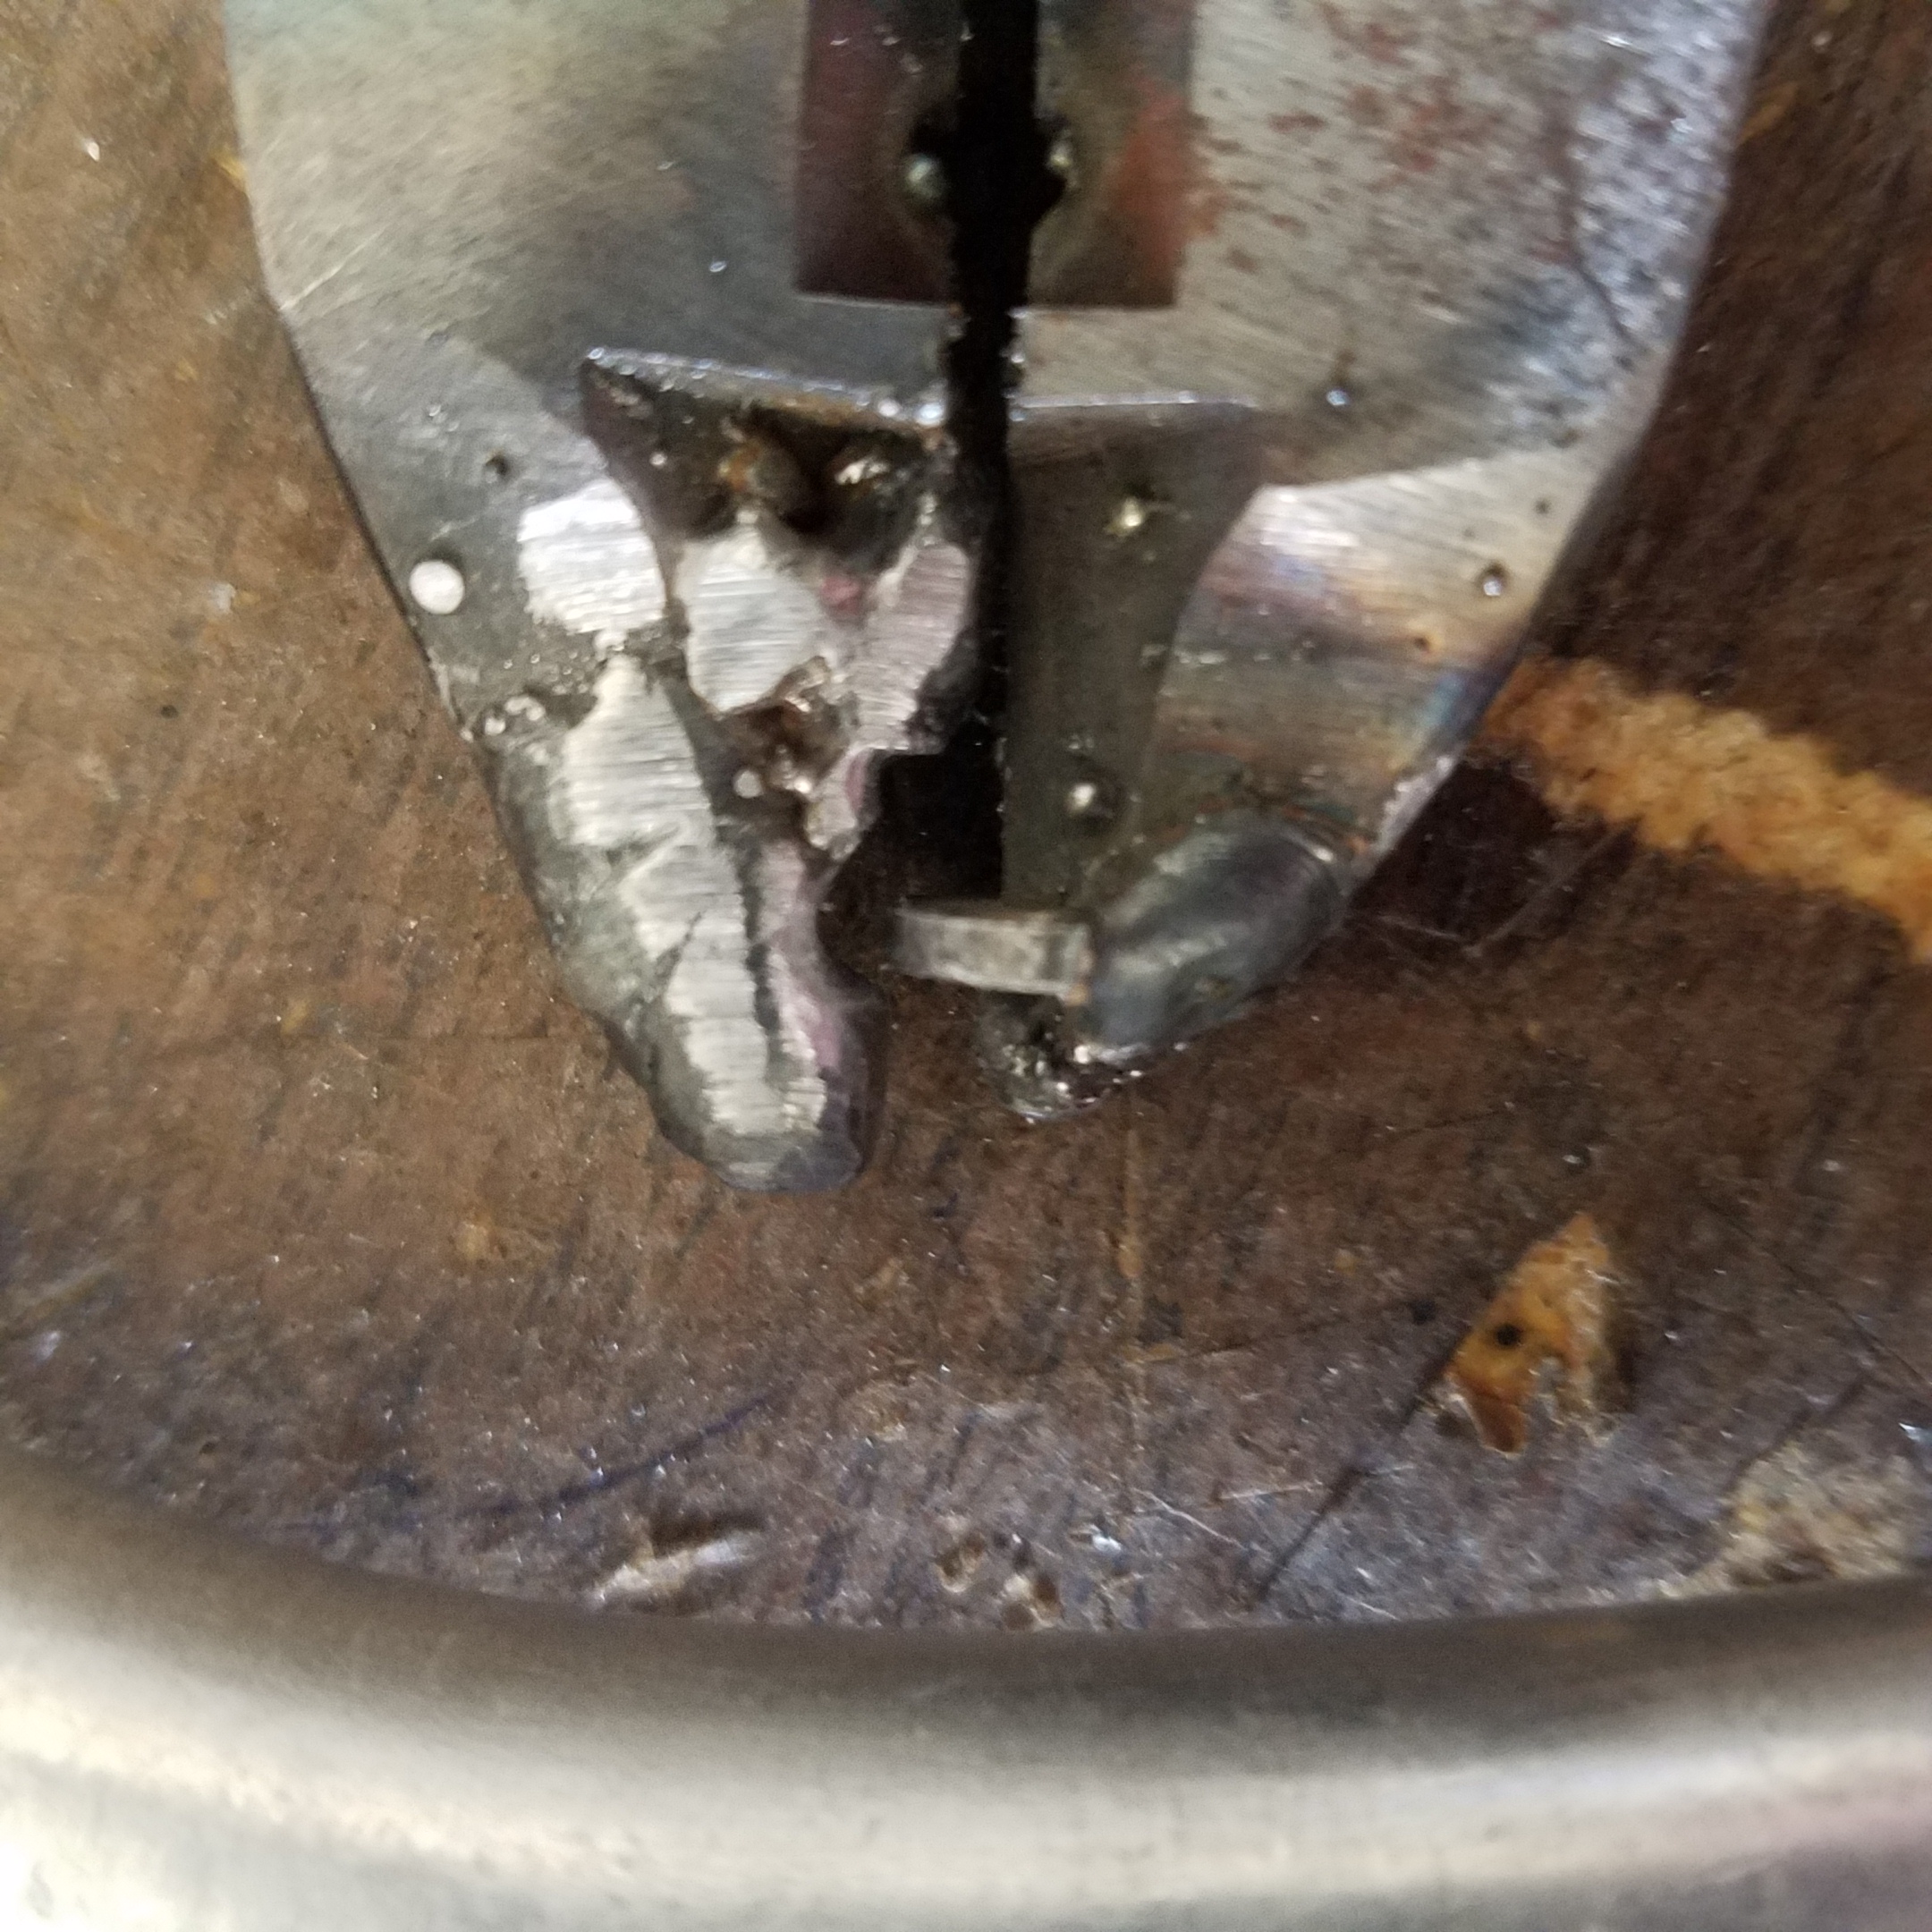
These pliers started out as Harbor Freight 36411 Crimp tool, but the wire
cutting was less than useful. The insulated crimp section (shown in picture with
a few MIG weld BB's on it was really nice compared to some others!
Modification required!
Pretty much what you see is what you need to do.
One side/jaw of tool:
A thick washer that fit in the smallest tube I needed to fit in, 1/2 diameter,
which might be as small as you can go for this type of of tool was cut up
and tack welded to the jaw.
Other side/jaw of tool:
It was simple adding and subtracting metal. A carbide burr was used to create
the curvature and then radius the sharp edges to prevent damage when forming.
Shaped it to make a teardrop shape to aid in hose installation. As far as the
gap/spacing between the washer and the radius edge, I got lucky, it seems to be
little more than the thickness of the aluminum tubing (Dorman brand) I'm using.
Followed by a "step" with a cut off wheel so when the tube is inserted, the tube
gets crimped in the exact same spot

RESULTS!!
Professional looking bead formed end that will assist in keeping the hose
you installed on the tube!
The idea came from YouTube! Lots of inspiring videos.. just need to find them!
3m Seam Sealer applicator
**next update**
-6an push lock hose fitting installer
** next update**